What should I do if I encounter a problem with the equipment debugging of the mask machine? What sho
What should I do if I encounter a problem with the equipment debugging of the mask machine? What should I do if I can't adjust it?
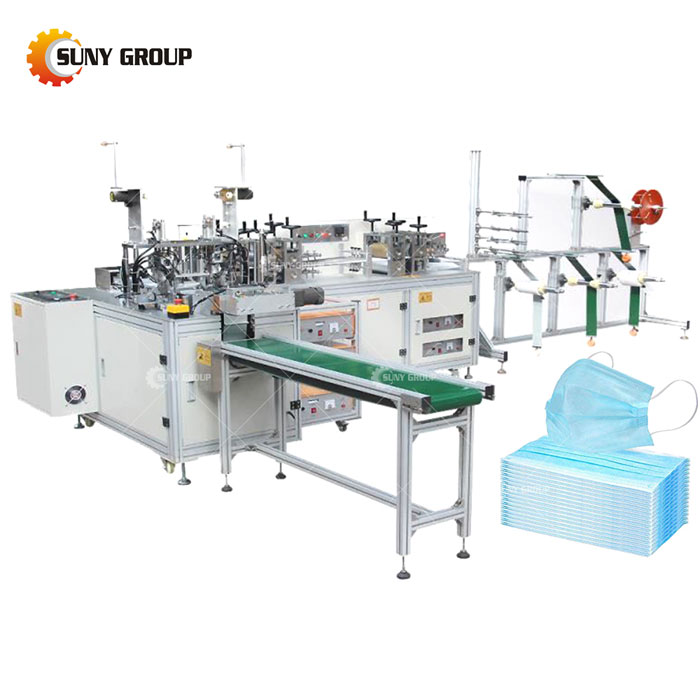
Don't be afraid, there are us. In order to solve the problem of mask machine debugging on the market, we have recorded the debugging and adjustment videos of the first and second generation machines, hoping to solve the problems of various manufacturers.
1. Press the welding button and the welding head will drop, but will not rise after welding.
1. Insufficient air pressure;
2. Defective solenoid valve;
3. Adjust the air pressure;
4. Maintenance program board;
5. The time adjustment switch is damaged;
2. The overload light is on during operation
1 The welding head is loose;
2 Improper frequency adjustment;
3 The welding head is broken;
4 Excessive pressure;
5 machine power is too small
3. The power indicator does not light up, the fan of the vibration box is weakened, cannot vibrate or the welding strength is weakened
①The power supply voltage is low;
②The input transformer is damaged;
③The power socket is in poor contact.
4. Press the welding button, and the welding head will immediately drop when it touches the processed object and rises without vibrating.
1. The descending stroke has not reached the welding position;
2. Poor contact of the travel switch;
3. Poor pressure trigger system;
Five, the welding head rises or drops too much impact
1. The buffer adjustment is inappropriate;
2. Buffer adjustment and lock up;
3. The descending speed is set too high;
4. Poor cylinder cushioning;
Six, the air pressure, power supply, and welding head are all normal but cannot be started
1. Poor contact of the emergency up button;
2. Poor program control circuit;
3. The start button is damaged;
4. The solenoid valve is damaged;
7. Turn on the main power switch and the fuse will blow
1. The ultrasonic power board is short-circuited;
2. The rectifier bridge is short-circuited;
3. The start-up current has a large impact and the fuse capacity is too small;
8. Excessive ultrasonic welding
①After melting, the size of the work object is different;
②There is too much damage to the surface of the work;
① Adjust the lowest point fine-tuning screw;
② Replace the welding head with a lower amplitude.
③The welding time is too long to shorten.
Nine: Too little energy input to work
1. Increase the pressure
2. Lengthen the splicing time
3. Increase the amplitude
4. Use higher power models
5. Poor resonance of ultrasonic welding head
Ten: Too much energy input to work
1. Reduce pressure
2. Reduce splicing time
3. Reduce the number of amplitude segments
4. Slow down the descent speed of the welding head, insufficient welding
11. Uneven welding and distortion of the workpiece
1. Check whether the size of the workpiece is different.
2. Check whether the operating conditions cause deformation of the work.
3. Adjust the buffer speed or pressure.
12. Uncertain base support
1. Where necessary, improve support points.
2. The base is redesigned.
3. Replace with a hard base.
4. If a large area of bakelite board is inclined, it needs to be reinforced.
Thirteen: The contact surface of welding head, base and workpiece is not flat
1. Redesigned the energy conservation point to make the height uniform.
2. Adjust the level screw.
3. Check whether the pretending conditions are true.
4. Check the shape and size of the workpiece size.
Side-curved workpiece with ribs.
Modify the jig to prevent the workpiece from bending outwards.
14: The workpiece error is too large. Tighten the tolerance of the workpiece. Re-modify the size of the workpiece.
Check the operating conditions (pressure, delay timing, welding timing, curing timing, etc.), uneven welding, improper alignment of the workpiece
1. Check whether the workpiece is offset during welding.
2. When checking the combination, whether the workpiece is aligned.
3. Check the parallelism of welding heads, workpieces and jigs. Lack of close contact between joint surfaces
1. Check the size of the workpiece.
2. Check the tolerance of the workpiece.
3. Check the position of the thimble on the joint surface.
4. Check the alignment of the workpiece assembly.
5. Check whether the workpiece is sunken.
6. Check the fit between the workpiece and the welding head.
7. Check whether the support of the jig is appropriate.
Fifteen: Inconsistent ultrasonic welding results
The proportion of additives is too high
1. Lower the fillings.
2. Check the operating conditions.
3. Change the type of filler, that is, change the short-line cone to the long-line cone.
Uneven distribution of additives
1. Check the operating conditions
2. Check the mold design
Poor material quality
Check operating conditions Poor fit of the workpiece
1. Check the size of the workpiece.
2. Check the tolerance of the workpiece.
3. Check the operating conditions
16: Use materials with poor fusion
Use secondary material
1. Check the materials with the factory.
2. Check the operating conditions.
Surface damage
Increased welding head temperature
1. Check whether the welding head screws are loose.
2. Check whether the welding head tool is loose.
3. Shorten the welding time.
4. Make the welding head radiate and cool.
5. Inspect the joint between the welding head and the transmission sub.
6. Check whether the welding head is broken.
7. If the welding head is made of titanium, change to aluminum.
8. If the welding head is made of copper, reduce the magnification.
Partial bumps on the workpiece
1. Check the size of the workpiece.
2. Check the fit between the workpiece and the welding head.
Improper fit between workpiece and jig
1. Check if the support is appropriate.
2. Redesign the fixture.
3. Check the change of mold and mold door workpiece.
Surface damage
Alumina (from the welding head)
1. The welding head is treated with hard chromium.
2. Use a heat-resistant plastic film mold (bag).
Surface damage
Improper fit between welding head and workpiece
Check the size of the workpiece.
Redo new welding head.
Check the change of the workpiece between the mold and the mold.
Seventeen: The size of the joint surface is not uniform
1. Redesign the joint surface.
2. Check the operating conditions.
The workpiece is too tight
1. Relax the fit of the workpiece.
2. Relax the tolerance of the workpiece. Workpieces cannot be aligned after welding. Workpieces are not aligned when combined
1. Add a fixed pile between the two pieces of work.
2. If possible, design tools to correct. Improper base support
1. Redesign the appropriate support fixture to raise the base where necessary.
2. If the bakelite is inclined, add a hard bracket. Side wall bent
1. Increase ribs on the side wall of the workpiece.
2. If the bakelite is inclined, add a hard bracket. Part tolerance is too large
1. Tighten the tolerance of the workpiece.
2. Check the operating conditions. During welding, internal parts are damaged. The amplitude is too large. Reduce the amplitude.
During welding, the internal parts are damaged. The welding time is too long.
1. Increase the amplitude or pressure to reduce damage to the welding time.
2. Adjust the buffer speed and delay time.
Eighteen: Welding time is too long
1. Increase the pressure or amplitude to reduce the welding time.
2. Adjust the buffer pressure.
The contact surface of the welding head, workpiece and base is poor in fit
1. Check the parallelism between the welding head workpiece and the base.
2. Check the fit between the welding head and the workpiece.
3. Check the fit between the workpiece and the base.
4. Where necessary, level up the base.
The influence of workpiece deformation is too large
Reduce the amount of influence of deformation.
Welding time is too long
Reduce welding time.
Eighteen: the size of the joint surface is not uniform
1. Redesign the joint surface.
2. Check the operating conditions.
The workpiece is too tight
1. Relax the fit of the workpiece.
2. Relax the tolerance of the workpiece. Workpieces cannot be aligned after welding. Workpieces are not aligned when combined
1. Add a fixed pile between the two pieces of work.
2. If possible, design tools to correct. Improper base support
1. Redesign the appropriate support fixture to raise the base where necessary.
2. If the bakelite is inclined, add a hard bracket. Side wall bent
1. Increase ribs on the side wall of the workpiece.
2. If the bakelite is inclined, add a hard bracket. Part tolerance is too large
1. Tighten the tolerance of the workpiece.
2. Check the operating conditions. During welding, internal parts are damaged. The amplitude is too large. Reduce the amplitude.
When welding, internal parts are damaged. Welding time is too long
1. Increase the amplitude or pressure to reduce damage to the welding time.
2. Adjust the buffer speed and delay time. Workpiece absorbs too much energy
1. Reduce the amplitude.
① Lock the welding head
② Press the sonic check button and adjust the sonic adjustment screw to minimize the current indication. (Please refer to other related content)
③ Replace the mold.
④ Replace related parts
⑤ Overhaul the power tube
⑥ Overhaul the power amplifier circuit
Twenty, the current is too large and overload during welding (above 7A)
1. High air pressure
2. The output gear is too large and the impact current is large
3. The buffer is too small
4. High trigger pressure and long delay time
21. There is no ultrasonic output, so ultrasonic welding cannot be performed
1. The ultrasonic crystal board is broken;
2. The ultrasonic vibration plate is broken;
3. Welding overload protection;
4. The output circuit fuse is broken.
5. The 0 position of the gear switch or the contact is not good.
6. The output line is not connected or short-circuited;
Recommend products


CONTACT US:
If you have any requirement or suggestion, please fill in the form and send to us, thanks!E-mail:sunymachine@gmail.com | Whatsapp:+8613674945231